Insert Media Files into a Zone
For showing the content, you need to insert media files to each
zone. The media files inserted can have different durations and
file formats.
-
If there is more than one zone in your layout, click the target
zone first. Then, click the  , a dialogue windows opens to
view and select the media files. You can select the media files
already located in the WCM server or upload new media files from
local drives. The thumbnails are available to verify each file.
, a dialogue windows opens to
view and select the media files. You can select the media files
already located in the WCM server or upload new media files from
local drives. The thumbnails are available to verify each file.
-
Click the media file or select multiple files, and then click OK
button in the dialogue window to insert into the zone. Repeat the
action to add more media, and then you can adjust the media file
order by drag and drop.
-
To change the playback duration, transition effect type,
and duration of a media file, adjust the attributes on each
media thumbnail.
-
To replace the file, click  and select a new
file.
and select a new
file.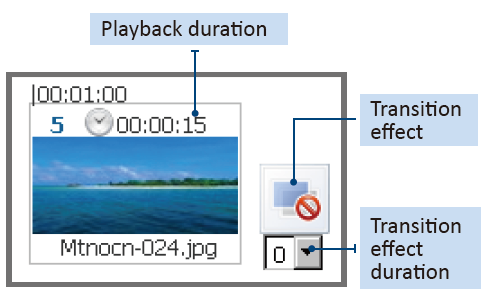

Use Import Media Wizard to Insert Media Files
This feature allows user insert a large quantity of media files into a zone by import an Excel (.xls, .xlsx),
CSV (.csv) or a text file (.txt).
-
Select a zone, 1. then click the Import Media Wizard button.

-
Select the file you are going to import. The format should follow the example below:
| Media Name |
Media Duration |
Transition Effect |
Transition Duration |
| Image01.jpg |
15 |
random |
3 |
| Image02.jpg |
00:00:15.00 |
random |
3 |
| Video01.mp4 |
180 |
Dissolve |
3 |
| Video02.mp4 |
00:03:00.00 |
Dissolve |
3 |
-
Import the file, and follow the system instruction to complete the settings.
Note: The media files listed in the Excel/CSV/text file must be uploaded to the Media Library in advance.