Defining Layout Attributes and Creating Zones
To begin, you will need to define the layout to match the resolution and orientation of your signage screen.
-
Click 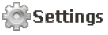 , a dialogue window opens to adjust the value of the screen.
-
If setting up multiple screens, adjust the quantities of the Horizontal Screens and Vertical Screens to fit your real screen array. For the multi-screen application setting, please refer to Multi Screen Application section.
Note: For video content, you can choose to “Keep last frame after media play end” (default value) to make sure the video will keep displaying the last frame and not repeat again under loop mode (ideal if other zones in the playlist are slightly longer than the video zone).
Note: When choosing the resolution of the playlist, user can choose same proportion resolution. For example, for a 3840x2160 content display, user can also choose to use “1920x1080” Screen Resolution and the playback result will still be pixel by pixel on a 3840x2160 screen as long as the Scale Mode is kept as default value: Stretch Fill in Zone Attribute.
While clicking  button, there is already a default zone in the layout. You can select the zone corner and drag it to a desired proportion; click the zone and drag/ drop it to the preferred position.
Click  and
and  ,
,  (Vertical Ticker) to add normal zones and ticker text zones. Click
  to delete the zone. If you set up more than one screen, you can clone the zones to other screens by clicking
  . The
. The  button to adjust the up and down zone order.
Zone Attributes
-
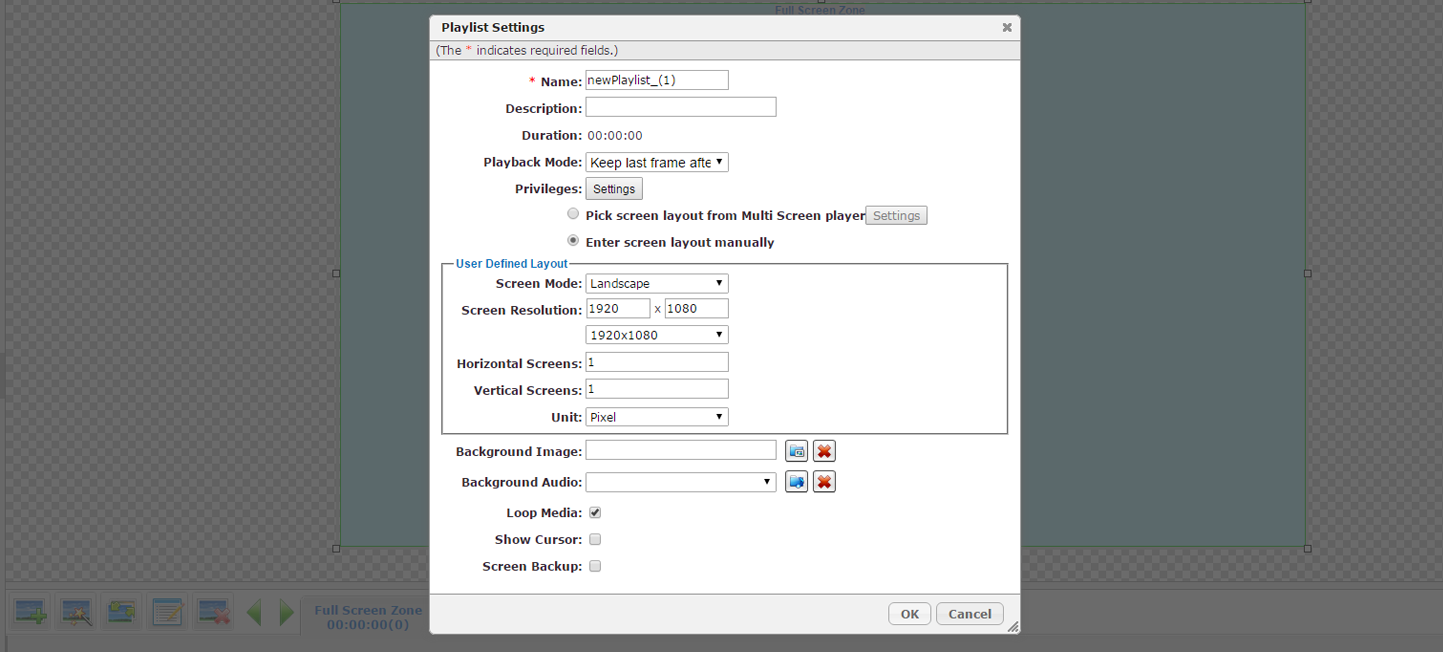
Double click the zone, a dialogue window opens for you to set up the zone privileges and other default settings. You can manually set up the zone location and size by entering the preferred values.
-
To lock the proportion of the zone after dragging to resize or manually inputing the zone width/ height, click the  button to lock the zone ratio.
-
If more than one media zone comes with audio, check the “Mute” option to mute the audio of the other zones and only keep audio for a certain zone.
-
User can check the “Auto republish when content change” option to update content of the zone frequently without the need to republish the whole playlist again.
-
5. The default setting of Scale Mode is “Stretch Fill”. With this setting, all the content will be stretched to fit the zone size with the exception for HTML media (or media created by HTML5) which will only keep original dimensions. User can also choose to “Keep Ratio & Touch Inside” – the content will keep the original ratio within the screen and may display black area at sides or “Keep Ratio & Touch outside” – the content will keep original ratio but partially outside of the screen.
Logo Attributes
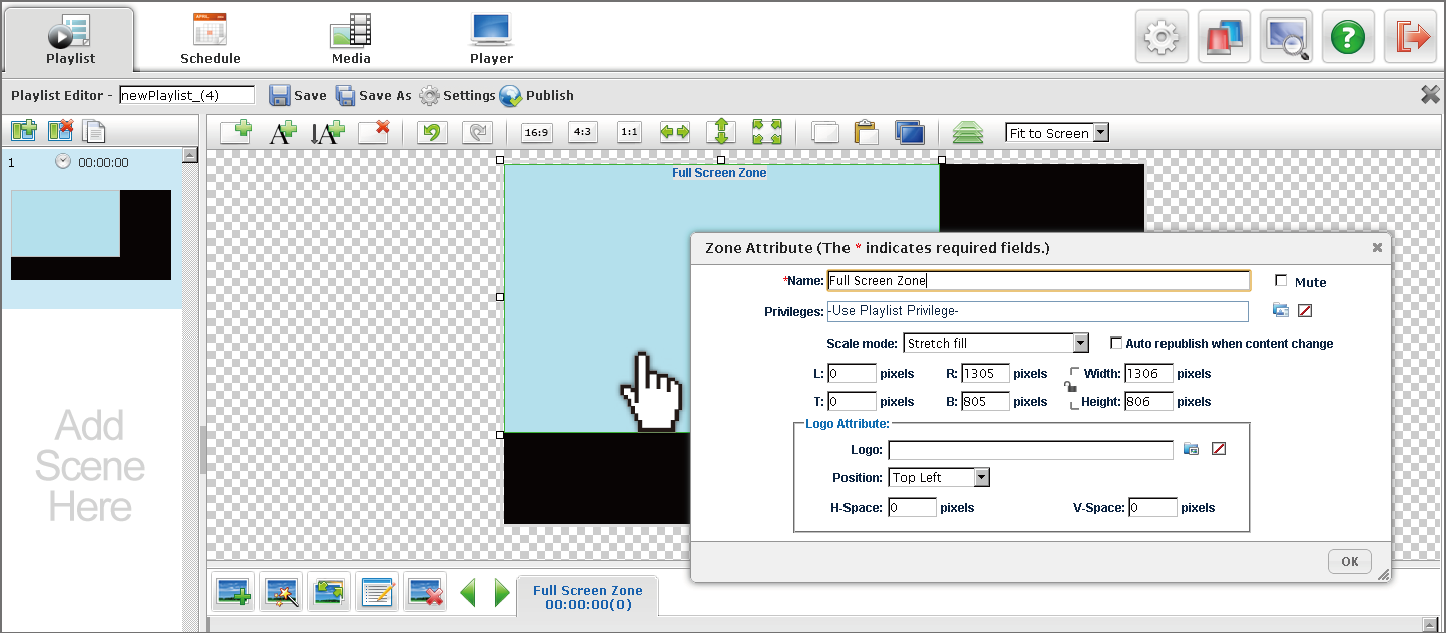
User can add a translucent logo on top of a zone.
-
Select a zone, double click it to enter Zone Attributes.
-
Select an image file in “Logo Attribute” of Zone Attributes as shown below. (Only JPG, BMP, GIF, and PNG file formats are supported for translucent logo.)
Note: User can apply the translucent logo on image/video/HTML/Flash media files. However, we suggest to not add a logo larger than 150 x 150 pixels or to apply on multi-screen appliances to avoid impacting the video playback performance.